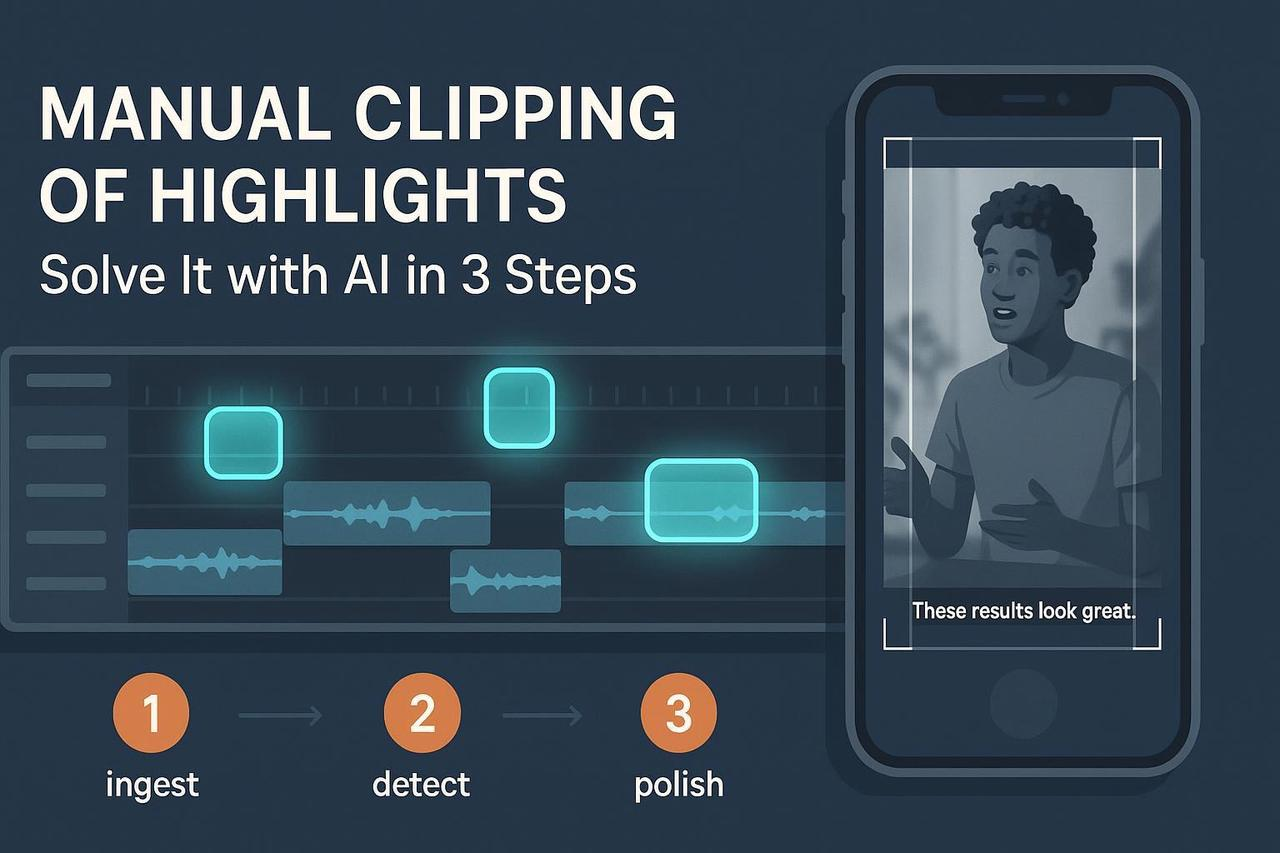
Auto Clip AI: Turn Long Video into Viral Shorts in 3 Steps
You have hours of brilliant video footage, interviews, webinars, events. The problem? Manually clipping those highlights into platform-ready shorts is a slow, tedious grind. You’re trading strategy time for timeline scrubbing.
Stop the manual labor. Auto clip AI technology can get you 80% of the way there in minutes. This guide gives you the simple, three-step workflow to turn any long recording into a stack of high-performing clips. Plan on just 20–45 minutes for a first pass on a 30–60 minute source.
At a Glance
-
Difficulty: Beginner–intermediate
-
What you’ll achieve: A faster, automated system to generate short-form highlights for TikTok, Reels, and Shorts.
-
The Goal: Use your human judgment only for polish, not discovery.
Step 1: Prep Your Source and Define Your Targets
Before you upload anything, a few minutes of prep ensures your auto clip ai works efficiently. This is the “garbage in, garbage out” prevention step.
Audio is Your Top Priority
If your source video is dialogue-heavy (interviews, podcasts), the quality of your audio dictates the quality of the AI’s picks.
-
Check Clarity: Is speech intelligible on laptop speakers? If not, fix the source. Noisy audio and crosstalk reduce transcript quality and highlight detection accuracy.
-
Get a Transcript: If available, generate or import a transcript. Better accuracy on the text equals smarter highlight suggestions from the auto clip ai online tool.
Set Your Output Targets
Don’t start without a clear destination. Tell your auto clip maker what you need!
-
Aspect Ratios: 9:16 is primary for Shorts/Reels/TikTok. Generate 1:1 and 16:9 versions for cross-platform ad tests.
-
Length Targets: Aim for 6–25 seconds for organic Shorts/Reels/TikTok and 15–45 seconds for ad tests.
-
Name Files Clearly: Good hygiene speeds review later (Project_Episode_Topic_Date).
Step 2: Let AI Propose the Gold (The Auto Clip Video Engine)
Now, let the auto clip ai take over. There are three primary ways AI finds your content gold. Pick the mode that best matches your source footage.
The 3 Auto Clip AI Modes
| AI Mode | Best For | How it Works | Example |
|---|---|---|---|
| Transcript-First | Interviews, Webinars, Podcasts | AI scores highlight-worthy lines and moments based on sentiment and keyword density. | Tools like Descript’s AI clip finder use this to assemble clips from text segments. |
| Viral-Style Auto-Clips | Creator Talk-to-Camera, Explainers | Multimodal AI proposes short candidates, often with auto reframing, captions, and platform presets. | Review the feature overview in Opus ClipAnything for a sense of this automation. |
| Motion/Event-First | Gameplay, Sports, Live Events | Systems look for motion bursts, scoreboard changes, or crowd audio peaks. | An applied case study detailing event detection is outlined in Modulai’s automatic highlights case. |
Run the Pass in Your Auto Clip Maker
-
Set Constraints: Input your target clip range (8–20 seconds) and aspect ratios (9:16 primary).
-
Ask for Bulk: Request 8–15 candidate clips from your source. More is fine—you’ll filter.
-
Use Nudges: If your tool supports it, nudge the AI toward keywords you care about (e.g., “pricing,” “tip,” “result,” “hook”).
Verification (Quick Checks):
-
Hook Test: Does each candidate show or say something compelling in the first 3 seconds?
-
Continuity: Does the moment make sense without watching the full context?
-
Audio: Any pops or garbles? If dialogue is muddy, it won’t perform.
Example Workflow with NemoVideo:
Use NemoVideo, our AI Video Editor Tool, to automatically detect key visuals and propose highlight candidates. You can then bulk-generate variants in 9:16, 1:1, and 16:9 so you can test across channels without manual resizing.
Step 3: Human Review, Polish, and Export (Add the Taste)
This is the shortest step, but the most important. You add the taste, clarity, and brand consistency the AI can’t.
✂️ Polish the Edit and Pacing
-
Final Trim: Keep the hook visible/audible in the first 3 seconds. Cut filler breaths, but avoid over-cutting so it still feels natural.
-
Captions and Safe Zones: Use 3–5 word chunks per caption card (max two lines). Keep captions within generous safe areas so platform UI elements don’t cover them on TikTok/IG/YouTube. For legibility principles, use WCAG 2.2 contrast criteria as a baseline.
-
Branding & Consistency: Add your logo end-slate or a subtle bug. Keep color and font consistent across all variants.
🔊 Final Sound Check
A loud, clear sound track is non-negotiable for short-form.
-
Normalize Dialogue around -14 LUFS integrated with True Peak at ≤ -1.0 dBTP. This is the standard for streaming platforms (iZotope’s mastering guide explains why).
-
Duck Music 8–12 dB under speech.
Export for Platform Dominance
Use these platform-safe defaults when exporting your auto clip video:
-
Primary Output: 1080×1920 (9:16) H.264 MP4.
-
Bitrate: 8–16 Mbps for 1080×1920.
-
Frame Rate: Match source (usually 30 fps).
Pro Tip: Always preview on-device before posting. A clip that looks great on your desktop might be unreadable when covered by the TikTok comment button (TikTok Ads Help details these UI specs).
Troubleshooting Mini-Map
| Symptom | Fix |
|---|---|
| AI picks feel flat | Raise the minimum score; shorten the clip length range; switch to transcript-first for talk-heavy content. |
| Jump-cut stutter | Add a cutaway or b-roll; nudge one cut a few frames for a smoother transition. |
| Captions cover faces or UI | Reduce font size by 10–15%; add top/bottom margins; verify on a phone (Netflix’s Timed Text Guide offers practical sizing help). |
Conclusion: Stop Scrubbing, Start Shipping
The grind of manual clipping is officially over. You now have a repeatable system: prepare → auto-detect → polish/export. Run this loop on every long recording, and you’ll consistently ship high-quality highlights without the manual slog.
Ready to put your auto clip ai workflow into action? Stop wasting hours and start maximizing your content ROI. Give NemoVideo a try today!